Before You Order a Wall Graphic: Paint and Surface Test Checklist
Before ordering a wall graphic, identify the paint and wall finish, confirm the paint’s cure instructions, and arrange a representative test with the intended film. A wall can look smooth and clean while still being a poor match for a particular adhesive. Testing a different sticker on a different painted wall does not answer that question.
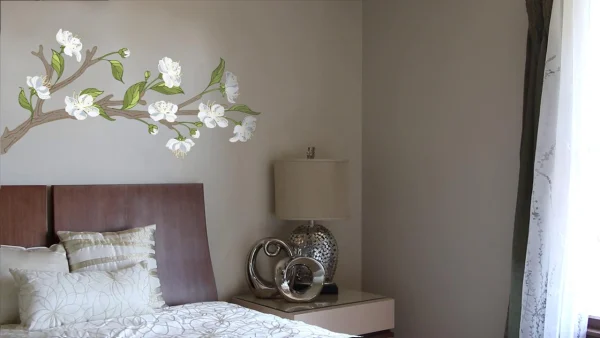
Get Quick Signs offers Low-Tac Wall Dressing for decorative wall graphics. “Low-tac” should not be treated as a guarantee that every paint finish will accept the graphic or survive removal unchanged. The right decision depends on the film, coating, condition and preparation of the actual wall.
Start a wall record before choosing artwork
Ask the property owner, painter or maintenance team for the paint manufacturer, product line, sheen and application date. Keep a photograph of the can label if one is available. Note the primer too, particularly where a wall has been repaired. Two areas painted the same color may have different coatings beneath them.
Also record whether the wall is smooth, lightly textured or deeply textured. Photograph it straight on and from an angle that reveals bumps and joints. Mark patched areas, seams, peeling paint, moisture staining and surfaces that shed dust when touched. A graphic should not be used to disguise an unresolved wall-condition problem.
Write “unknown” when a detail cannot be confirmed. That gives the installer a useful question to investigate. An invented paint type or assumed cure date can make a test look more conclusive than it really is.
Use the coating’s cure instructions
Dry-to-touch and ready-for-graphics are not interchangeable instructions. Ask the paint manufacturer and film supplier what applies to the coating and application you have. Avoid using a fixed waiting period copied from an unrelated decal product.
In its Application: Walls bulletin, 3M directs users to let wall paint cure fully according to the paint manufacturer’s recommendations and to test each intended film on each different wall. That guidance supports a product-specific approach; it does not establish a warranty or test threshold for every film sold elsewhere.
Make the test representative
Ask for the test method appropriate to the film being considered, including preparation, application, observation period and removal. Do not invent a solvent mixture or scrub the paint aggressively to make a sample stick. Preparation can change the finish, so any proposed cleaner should also be suitable for the coating.
Choose an inconspicuous area with permission. If the finished graphic will cross different wall conditions, include those conditions in the plan. For example, a smooth center section does not represent a repaired corner, and a newly painted wall does not represent the older wall beside it.
A simple hypothetical test log might include two candidate films on three representative locations. That creates six labeled observations: 2 films × 3 locations = 6. This is an organizational example, not a required sample size or an adhesion standard. The supplier may recommend a different procedure.
| Field | Record |
|---|---|
| Location | Wall A, repaired area near doorway |
| Film | Exact product and sample reference |
| Preparation | Approved method actually used |
| Observation | Edge condition, bubbles and surface change |
| Removal result | Coating condition after the specified procedure |
Document what happened, not just “passed”
Photograph each sample with its label. Record lifting edges, visible texture, trapped air or a change in the wall coating. Keep the time and room conditions with the notes when the test instructions request them. If a result is uncertain, share the evidence rather than escalating the adhesive strength on your own.
A successful small sample is useful evidence, but it is not proof that a large installation will behave identically. Panel seams, wall repairs, handling and the installer’s technique still matter. Agree on who will evaluate the results and authorize the next step.
Finish the brief before ordering
Send the wall record, photographs, proposed graphic dimensions and test results through the project contact form. State whether the message is temporary or intended to remain for an extended period. That helps the team discuss both application and eventual removal.
Once the surface and film are confirmed, finalize the artwork around doors, switches and other obstructions. Keeping the surface decision separate from the visual design prevents a polished mockup from becoming an accidental promise about adhesion.